Aesthetic Practice Before & After Photos:
How to Take, Use and Share Them
Show a new patient real results from your own practice that match their concern, while they are still in the chair. Search by procedure, build the comparison in two taps, and never leave the room to do it.
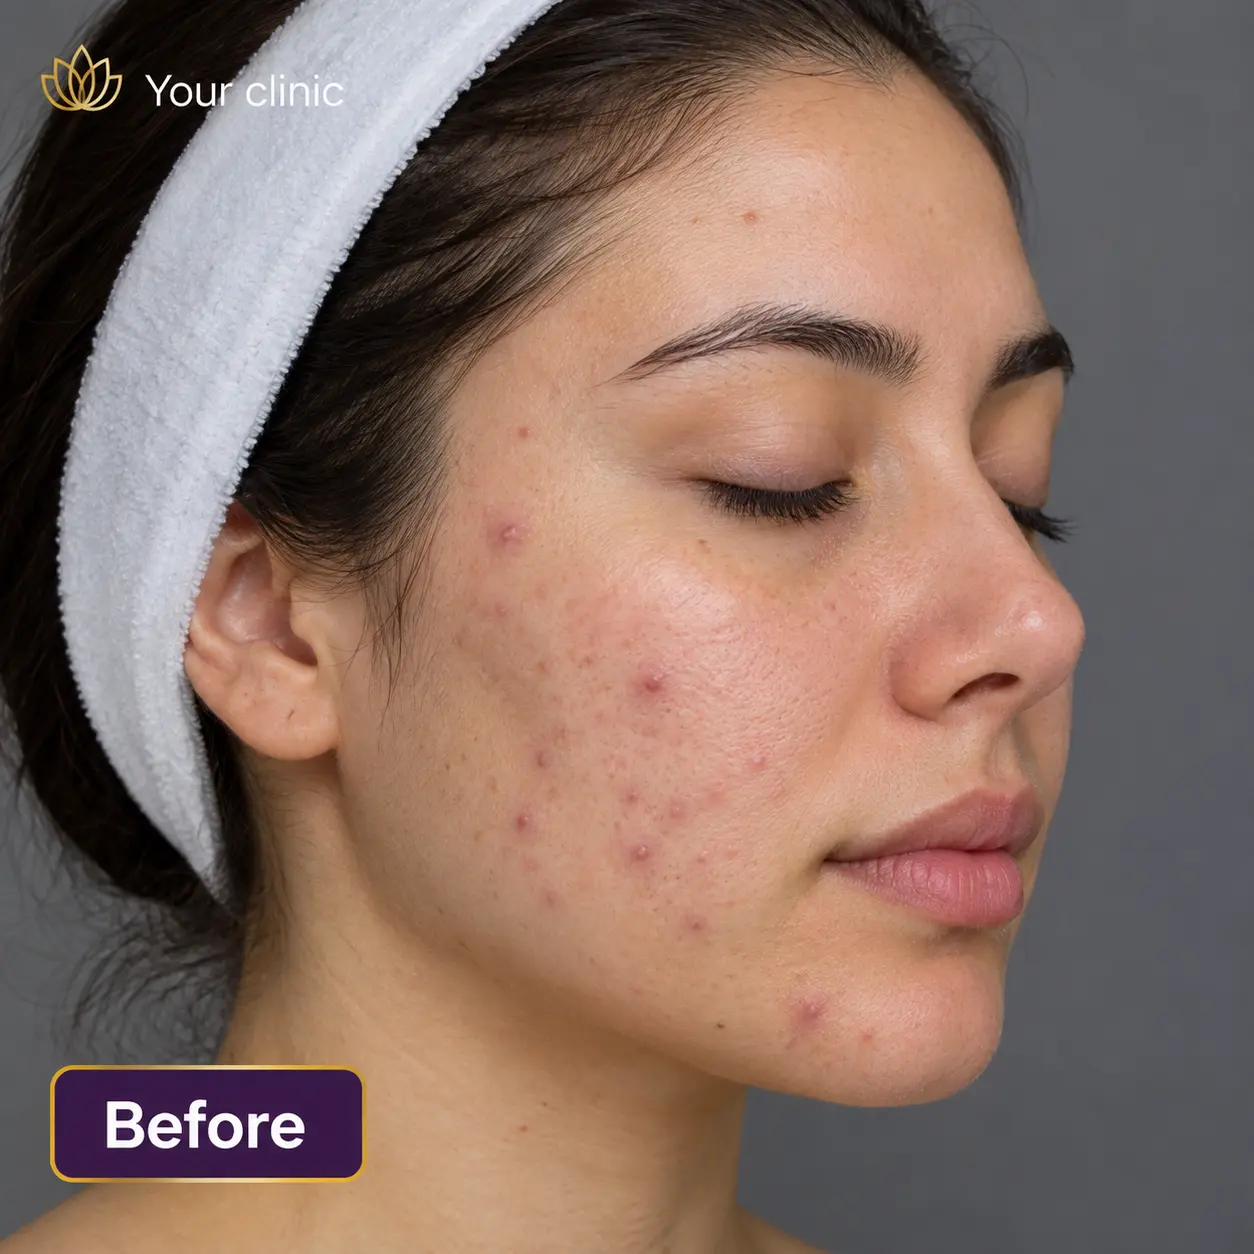
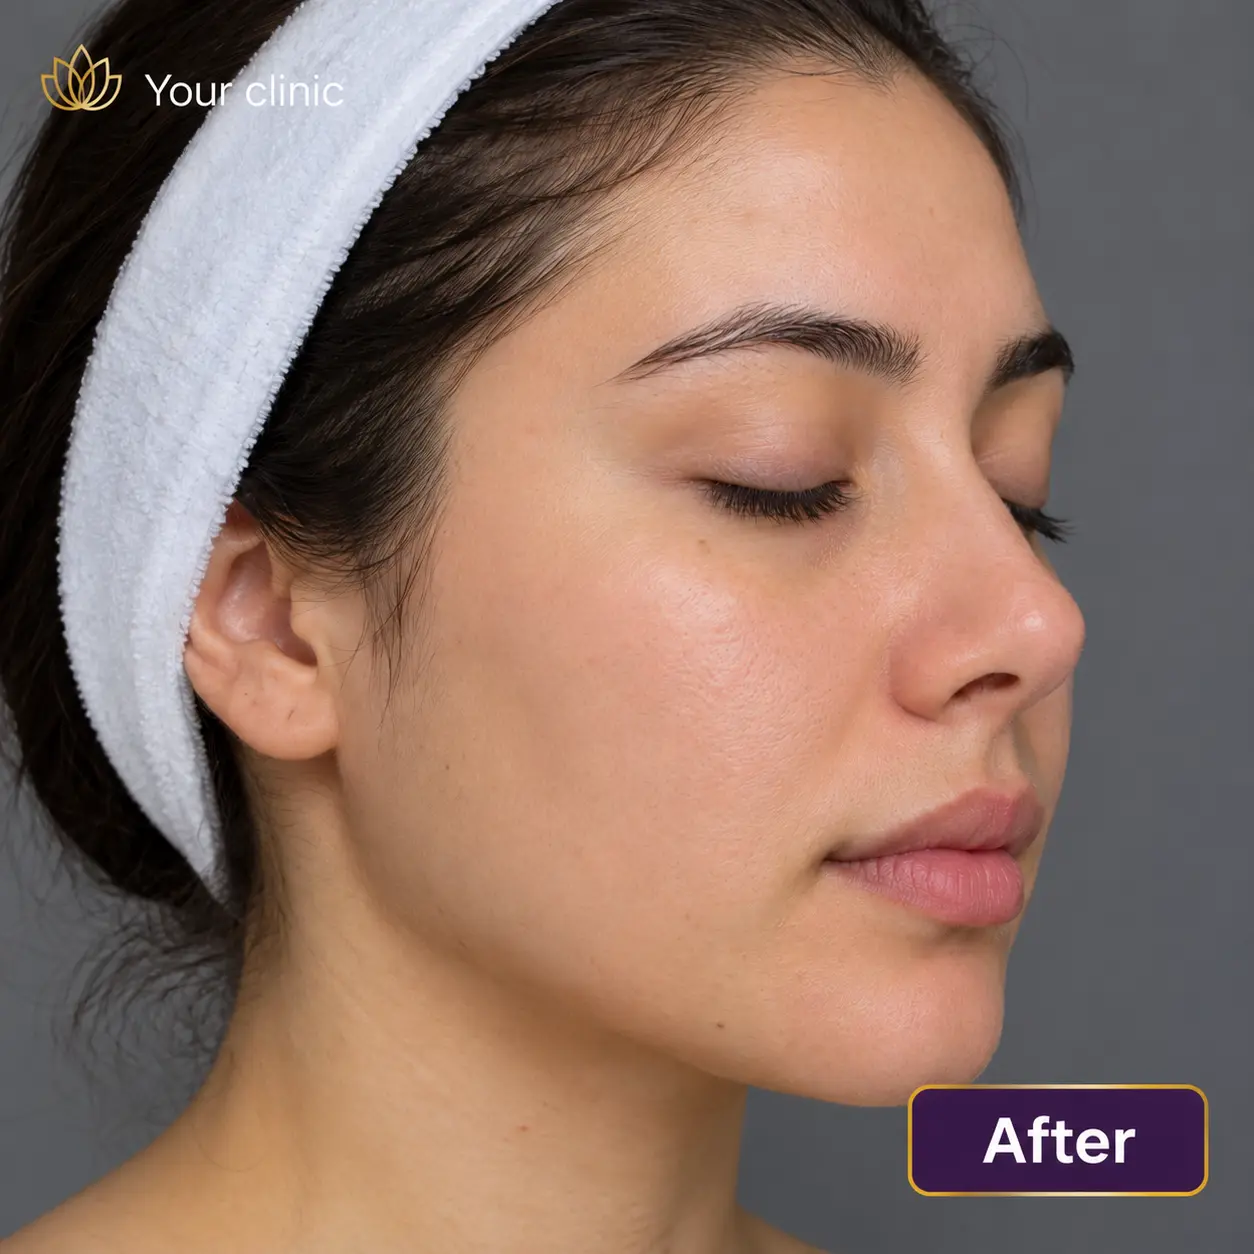
Your best results are already in your library. You just cannot reach them fast enough.
A new patient sits down and asks what a rhinoplasty would do for a nose like theirs. You know you have the perfect case. It was maybe eighteen months ago. You start scrolling. Twenty seconds pass. The patient is watching you scroll. By the time you find the photo, the moment has passed and you are back to explaining the result instead of showing it.
Or a patient returns at six weeks convinced nothing has changed. You know they have improved. Proving it means finding two photos from different visits, downloading both, opening a third app, laying them side by side, and exporting. Five to ten minutes, with the patient waiting.
What is before-and-after photo management?
Before-and-after photo management is the process of storing, organizing, comparing, and securely sharing clinical photographs from different patient visits. Instead of searching through separate folders or devices, practices can keep patient photos connected to the patient’s record, treatment, and visit history, making it easier to create consistent before-and-after comparisons during consultations.
Show them a case that looks like theirs
Tag the treatment name, diagnosis, body area and date when you take the photo. No filing later, no digging through folders. So during a consultation you search the way the patient is thinking:
Matching results appear in seconds, drawn from your own practice rather than a manufacturer’s stock gallery.
This is what makes a patient trust the result. They’re not looking at a stock photo or a manufacturer’s example. They’re looking at your own patient, your own work. That’s proof, not a pitch.
How does before-and-after photo management work?
Open the patient’s photo history, select any two photos from any two visits, and the comparison is built. One week apart or two years apart, it makes no difference.
Side by Side
The straightforward view. Two images, placed next to each other.
Overlay
Fade between the two images in the same frame.
Slide
Drag a divider across to reveal the change progressively.
Add your clinic logo, watermark and any custom text before you save or share it.
Overlay and slide are the ones that end arguments. Side by side still leaves room for doubt, the patient is comparing two separate pictures and deciding for themselves. Overlay and slide remove that gap. The change happens on the same features, in the same frame, so there’s nothing left to debate.
That matters most with the returning patient who’s convinced nothing has happened. Overlay and slide make changes easier to see because both images occupy the same frame. This can help patients compare specific features more clearly than looking at two separate photographs.
The comparison is only as useful as the photos you capture. For more consistent before-and-after views, standardized clinical photography helps you match the patient’s earlier angle, position, and framing when taking the next photo.
Every comparison you make is filed for the next consultation
When you save a before and after to a patient’s record, a copy is automatically filed into your portfolio under that treatment name.
You do not maintain it. You do not remember to add to it. Every comparison you build during a consultation makes the next consultation easier, because it becomes searchable material for the next patient asking about that procedure.
Over a year of ordinary clinic work, this is how a practice ends up with a genuine, searchable, procedure-specific portfolio without anyone ever sitting down to build one.
The same feature does different work depending on who is in the chair
New patient
They arrive with a concern and no idea what is achievable. You search your portfolio by their procedure or condition and show them results from your own practice on someone like them. They stop imagining and start deciding.
Returning patient
They arrive doubting their progress, which is common at the point where healing is real but gradual. You open their timeline, build a comparison between any two visits, and slide between them. This gives the patient a clearer way to see how their appearance has changed over time.
The second case is worth as much as the first. A patient who cannot see their own improvement is a patient who leaves a review about it.
Share with the patient, or publish with authorisation
With the patient, send the comparison directly by WhatsApp or email in one tap, without saving their number to your personal contacts.
For marketing, add your watermark and logo inside CureCast and share to Instagram, Facebook or any app on your device. The image never passes through your personal camera roll.
Marketing use needs written patient authorisation, and that is a separate thing from consent to treatment. CureCast includes consent forms with up to four signers, so authorisations are captured and stored in the patient’s record rather than in a drawer, and marketing permission is recorded against the patient so you can see it at the moment you are building a gallery.
Under US HIPAA, using a patient’s photograph for marketing is a use of protected health information that requires a written authorisation under 45 CFR §164.508. The authorisation must include specific required elements: a description of the information, who may disclose it, who may receive it, the purpose, an expiration date or event, and the patient’s signature and date (§164.508(c)(1)). It also cannot be combined with another document. Section 164.508(b)(3) prohibits compound authorisations, subject to limited exceptions, so a marketing authorisation bundled into a surgical consent form is not valid.
Captured in the app, filed automatically, never on a personal phone
A photo taken through CureCast goes directly into the patient’s record. It is never written to the camera roll and never syncs to a staff member’s personal cloud, so a departing team member does not leave with your clinical images.
Patients can also send photos in themselves. Generate a secure upload link, sent by WhatsApp or email in a tap. They upload from their own phone with nothing to install, the files land in their record on the date uploaded, and you get a notification.
This is how post-operative photographs actually get collected from patients who never come back for the follow-up appointment, which is the usual reason a before and after portfolio has plenty of befores and not enough afters.
Built around the way your practice works
Before-and-after photography plays a different role across aesthetic practices. A plastic surgery practice may need precise surgical comparisons, while dermatology and medical spa teams may track changes across ongoing treatments and procedures.
See how CureCast supports plastic surgery, dermatology, and medical spa photo workflows.
Built for real clinical photo workflows
The numbers that matter in a consultation, a follow-up and a before and after.
Find any photo
Search by patient, procedure, body area or date. Show the match while the patient is still in the chair.
Visits in one view
Compare two visits side by side, or four at once to show the full journey. Weeks or years apart.
Reference photos
Pick up to 15 earlier photos as a guide in TrueAlign Match. Every new photo lines up with the last.
Consent signers
Up to four signatures on one consent form. Stored with the patient's record.

See How CureCast Fits Your Practice
Discuss how CureCast fits into your clinical photo workflow, from capturing and organizing patient photos to securely managing them across your practice.
Prefer email? [email protected]
Everything you need to manage clinical photos.
CureCast brings before-and-after comparisons, standardized photography, patient photo uploads, and organized clinical photo management into one workflow for your practice.
Clinical photo management for your practice
- ✓ Before-and-after photo management
- ✓ Consistent clinical photography
- ✓ Secure patient photo uploads
- ✓ Organized patient photo library